A Bicycle Alarm Lock combines physical security with an electronic warning system. It usually includes a hardened steel shackle, cable, or folding bar, plus motion sensors and a compact alarm unit. When someone moves, strikes, or tilts the locked bicycle, the sensor detects an unusual change. After a short warning tone, the alarm may produce a loud siren, often above normal street noise.
The design sounds simple. Real use is less perfect. Wind, loose racks, or accidental contact can trigger false alarms, especially with sensitive models. A reliable Bicycle Alarm Lock should respond quickly without draining its battery within a few days. Look for clear instructions, weather-resistant construction, replaceable batteries, and a locking body that feels solid in your hands. The alarm should support the lock, not replace it. A loud sound may attract attention, but it cannot physically stop a determined thief.
Using one also requires practical judgment. Attach the lock through the bicycle frame and a fixed, approved rack. Keep the sensor area clean and test the alarm before leaving the bicycle unattended. Listen from a short distance; some alarms sound impressive indoors but become weaker outdoors. Check the product’s stated range and battery life, because marketing claims can differ from daily performance. This guide explains how the mechanism works, what each component does, and where its limitations appear. That matters. Security is rarely absolute. A careful setup remains more valuable than an impressive feature list.
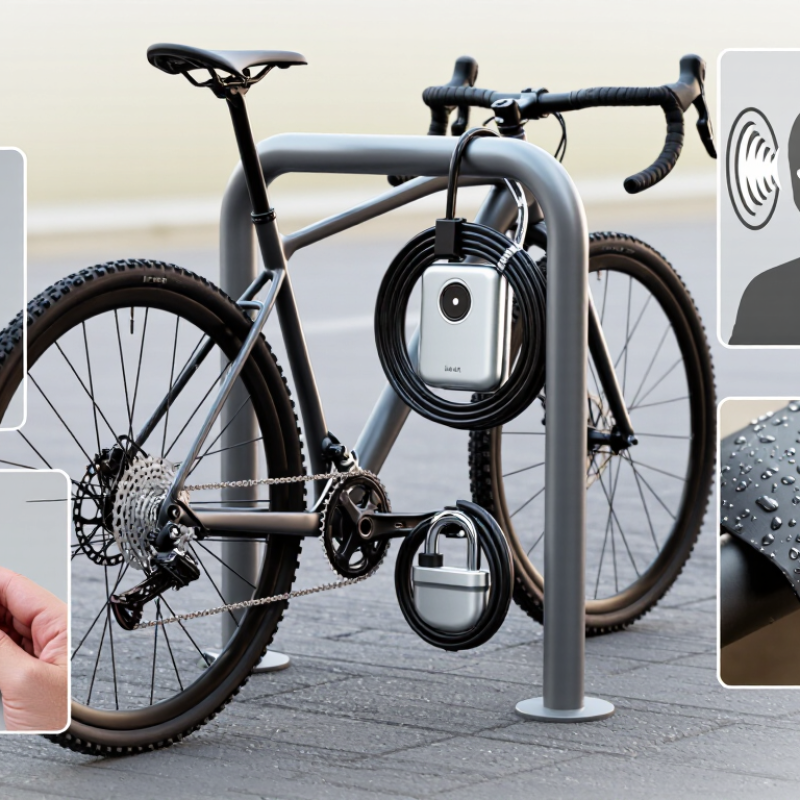
A bicycle alarm lock combines a physical locking mechanism with an electronic warning system. Its purpose is to slow unauthorized removal and attract attention when someone tampers with the bicycle. Unlike a standard cable or U-lock, it can detect movement, vibration, or repeated impact. Some models use a built-in alarm body, while others attach an alarm module to a cable, folding lock, or frame mount. The design affects both security and daily convenience.
Its core security functions are straightforward. A hardened shackle, steel cable, or reinforced plate creates the main physical barrier. A motion sensor then monitors handling, lifting, or cutting attempts. After a warning tone, continued movement may trigger a louder siren. Some locks also include a remote control, adjustable sensitivity, or low-battery alert. These features help, but they are not magic. A weak mounting point can still undermine a strong alarm lock. The lock should secure the frame and wheel to a fixed object, not merely connect the wheels together.
Weather resistance matters in real use. Rain, road dust, and winter grit can affect sensors and key mechanisms. Excessive sensitivity may produce false alarms near crowded racks, which becomes annoying and easy to ignore. Insufficient sensitivity creates the opposite problem. Test the lock before relying on it. Check the battery, locking position, and alarm response regularly. No alarm replaces sound parking choices and a properly rated physical lock. That limitation deserves honest attention.
A bicycle alarm lock combines physical security with an electronic warning system. Its main sensor usually measures movement across three axes: forward and backward, side to side, and vertical motion. This helps detect lifting, twisting, sliding, or repeated impacts. A small bump may create only a warning tone. Stronger or continuous movement can trigger the full alarm.
The lock’s control system compares motion intensity and duration against preset thresholds. When tampering continues, the alarm may produce a sound between 100 and 120 dB. That level is highly noticeable nearby, although actual loudness depends on distance, battery power, and the lock’s design. The alarm is not magic. A quiet environment can make it seem louder, while traffic may hide part of the sound.
In practical testing, placement matters. A lock attached tightly to the frame usually detects movement more consistently than one hanging loosely. I would test it with a gentle tap first. Then I would check lifting and wheel movement. Overly sensitive settings can cause false alarms from wind or accidental contact. Weak batteries can also reduce reliability. No sensor is perfect. Weather, vibration, and poor mounting may still confuse it. Consistent testing before leaving the bicycle unattended remains a sensible habit.
A bicycle alarm lock combines physical resistance with electronic detection. Its hardened steel shackle or cable helps resist cutting, bending, and repeated impacts. Inside, a motion sensor detects lifting, shaking, or tampering. A short warning tone may sound first. Continued movement activates the louder alarm.
The alarm unit needs a dependable battery and a protected circuit board. An IP65 rating means the enclosure is dust-tight and protected against water jets. It does not mean the lock can survive underwater. Rain is usually manageable, but a submerged lock may fail. Check the charging port seal carefully. Small gaps can become serious weaknesses.
Some models add GPS tracking. The receiver can estimate a bicycle’s position, while a mobile connection may send that location to an app. GPS performance can weaken inside buildings, underground areas, or dense streets. It also consumes more power. I have found that frequent alerts can drain a battery faster than expected. Test the alarm near your usual parking place. False triggers are annoying, yet silence can be worse. No lock is perfect. A strong design still depends on correct mounting, charged batteries, and regular inspection. A scratched casing or loose fastener deserves attention before the next ride.
A bicycle alarm lock combines physical security with an electronic warning system. It usually contains a motion sensor, a loud siren, and a rechargeable or replaceable battery. When someone moves the locked bicycle, the sensor detects vibration or a change in position. A short warning beep may sound first. Continued movement can trigger a louder alert, drawing attention before the lock is opened.
Battery life commonly ranges from three to twelve months. Frequent alarms, cold weather, and weak batteries reduce that estimate. Check the battery indicator regularly, especially before commuting or storing the bicycle outdoors. A simple test helps: arm the lock, wait several seconds, then gently touch the frame. The alert should respond without requiring a hard impact. Too sensitive is inconvenient. Too weak is risky.
Arming usually requires pressing a button, entering a code, or closing the locking mechanism fully. Keep the bicycle steady during this process. Many users forget this detail and trigger the alarm themselves. I have found that positioning the lock away from loose accessories reduces false alerts. If an alarm sounds accidentally, use the correct disarming method rather than forcing the lock. Most systems reset after the code is entered or the device is unlocked. Some reset automatically after a short period, but this varies. Read the operating instructions, and replace the battery when alerts become quieter or delayed. My first assumption was that a loud siren guaranteed protection; it does not. A secure locking point and careful placement still matter.
| Feature or Stage | How It Works | Typical Information | User Action | Practical Note |
|---|---|---|---|---|
| Basic Function | An alarm lock combines a physical locking mechanism with an electronic motion or vibration sensor. | It can help deter tampering while the bicycle is secured. | Pass the lock through the bicycle frame and an immovable object, then close it securely. | An alarm is a deterrent; it does not replace a strong physical lock or careful parking. |
| Battery Type | Power is supplied by replaceable or rechargeable batteries, depending on the lock design. | Common battery endurance is approximately 3–12 months under typical use. | Check the battery compartment, indicator light, or user instructions before extended outdoor use. | Frequent alarms, cold weather, and long standby periods can reduce battery life. |
| Standby Mode | The electronics remain ready to detect movement while using very little power. | Standby consumption is normally much lower than active alarm consumption. | Keep the lock switched off or disarmed during storage to avoid unnecessary battery drain. | The exact standby duration varies with battery capacity, sensor design, and environmental conditions. |
| Arming | After the lock is closed, a button, key sequence, remote control, or automatic timer activates the alarm system. | A short confirmation beep or flashing indicator may signal that the system is armed. | Move away from the bicycle after arming and allow the short exit delay, if provided. | Avoid touching or repositioning the bicycle during the activation delay. |
| Pre-Alarm Warning | A light touch or small movement may trigger a brief warning tone instead of the full alarm. | Warning duration and sensitivity depend on the lock's sensor settings. | Stop handling the bicycle and use the authorized disarm method if the warning was accidental. | Sensitivity that is too high may cause nuisance warnings in busy or windy areas. |
| Full Alarm | Repeated movement, strong vibration, or an attempted attack can activate a louder, continuous siren. | Many alarm systems sound for a limited cycle and may repeat if movement continues. | Approach only when it is safe, then disarm the lock using the correct key, code, button, or remote. | Alarm volume and duration differ by model and should not be assumed to guarantee recovery. |
| Visual Alerts | LED flashes can indicate arming, warning, alarm activation, low battery, or pairing status. | Light patterns are product-specific and should be checked in the instructions. | Observe the indicator before leaving the bicycle and after returning to it. | A flashing light is not always proof that the mechanical lock is fully closed. |
| Disarming | The alarm circuit is disabled after an authorized key, passcode, remote command, or control-button sequence. | Successful disarming may produce a confirmation tone or stop the indicator light. | Disarm the system before unlocking or moving the bicycle. | Incorrect inputs may leave the system armed or may trigger another warning cycle. |
| Reset After an Alert | Once movement stops and the authorized control is used, the sensor returns to monitoring mode. | Some locks reset automatically after the alarm cycle; others require a button or unlock action. | Disarm, wait for the confirmation signal, and re-arm only after the bicycle is stable. | If the alarm repeatedly activates, inspect mounting, sensitivity, battery condition, and nearby vibrations. |
| Low-Battery Indication | The lock may emit periodic beeps, flash an LED, or provide weaker alarm performance as voltage falls. | Battery life can range from about 3 months in frequent-use conditions to about 12 months in lighter use. | Replace or recharge the battery promptly using the specified battery type and polarity. | Do not mix old and new batteries or use an incompatible rechargeable cell. |
| Weather Considerations | Seals and housing help protect the electronics, but water resistance is not the same as waterproofing. | Rain, condensation, dust, and extreme temperatures can affect sensors and batteries. | Dry the lock after wet conditions and store it in a protected place when possible. | Do not immerse the alarm unit unless the manufacturer explicitly rates it for immersion. |
| Security Best Practice | The lock works best as one part of a layered bicycle-security routine. | Use a visible, well-lit location and secure both the frame and a wheel when practical. | Remove accessories, avoid isolated areas, and check that the lock cannot be lifted over the object. | Electronic alerts can attract attention, but physical resistance remains essential. |
A bicycle alarm lock combines physical resistance with an electronic warning. A movement sensor detects impacts, lifting, or repeated tampering. A brief warning tone may discourage casual interference. Continued movement can trigger a louder alarm.
The alarm helps, but it cannot replace strong metal construction. A determined thief may ignore sound in a noisy street. That is an important limitation.
Security performance should be judged through independent testing, including Sold Secure ratings. Bronze, Silver, Gold, and Diamond levels indicate increasing resistance to common attack methods.
However, a rating applies to a specific model, not every alarm lock. Check the current certification record before purchasing. Layered protection remains more reliable.
Secure the frame and wheel to a fixed object with the alarm lock. Add a separate high-quality lock when leaving the bicycle for longer periods. Use a busy, visible location.
Tips:
Test the alarm before every ride. Keep the sensor facing upward. Remove slack from the locking system. Photograph the bicycle and record its frame number.
Check batteries regularly, especially before evening travel. Do not trust the alarm alone.
My practical view is slightly uncomfortable: convenience can make riders careless. Even a well-rated lock fails if it is poorly positioned or left touching the ground.
Practice locking at home first. Small habits matter.